




|
Subject Concepts
|
Art Concepts
|
||
|
Content
Covered:
Use of balance, straight, zig-zag, and differentiating
lines
|
Content
Covered:
Fine motor skills, color effects, use
of imaginative thinking, use of pressure and composition
|
||
|
State Standards & Objectives (USOE/UEN):
a.
Standard 1 Communicating science Objective 2c: Connecting ideas
with reasons (evidence).
b.
Standard 3 Objective 1a: Describe, classify, and communicate
observations about the motion of objects, e.g., straight, zigzag, circular,
curved, back‐and‐forth, and fast or slow
|
State Standards & Objectives
(USOE/UEN):
Integrated Core Objective 2c: Develop manipulative skills (e.g.,
cut, glue, throw, catch, kick, strike).
|
||
|
Learning
Outcomes:
The student will be able to…
Identify varying shapes and lines and
their effect on art as a whole. They will also be able to identify
differences between varying pressures with hand movement in creating art.
|
Learning
Outcomes:
The student will be able to…
Develop their fine motor skills and be able to identify symmetry
and symmetrical balance through an artistic exercise that emphasizes composition
and hand movement.
|
||
|
Lesson
Plan
|
|||
|
1.
Set out cups of water and trays of paint at each table before
class.
2.
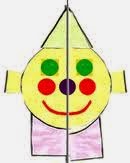
Get symmetrical powerpoint working to display images on common
symmetry the kids are probably already familiar with.
3.
Go over powerpoint and explain symmetry, reflections, mirroring,
etc,.
4.
Have each child fold paper in half.
5.
Display on overhead and example of you creating a composition
using the paint dots.
6.
Instruct children on importance of thickness of dots, lines,
squigglys, etc,.
7.
Have the kids drop shapes and dots.
8.
Demonstrate folding over paper and “smashing” so that the paint
is transferred easily.
9.
Display work to dry and clean up.
10.
Take pictures of kid’s faces and explain next art project coming
up!
|
Materials
Needed:
· Art construction
paper
· over head for
display
· pencils for each
child
· Paint in various
colors at each tables
· Paint brushes for
each child
· Water cups
|
||


|
Subject Concepts
|
Art Concepts
|
||
|
Content
Covered:
Answering questions about specific
details in literature, describe characters, understand a moral in the story
|
Content
Covered:
Fine motor skills, color effects, use
of imaginative thinking
|
||
|
State Standards & Objectives (USOE/UEN):
Reading Literature Standard 1: Ask and answer questions about
key details in a text.
Reading Literature Standard 3: Describe characters, settings,
and major events in a story, using key details
|
State Standards & Objectives
(USOE/UEN):
Integrated Core Objective 3b: Express how colors, values, and
sizes have been controlled in artworks to create mood, tell stories, or
celebrate events.
|
||
|
Learning
Outcomes:
The student will be able to…
Draw from a literary piece essential
components such as character, setting, illustration techniques, plot, and
moral
|
Learning
Outcomes:
The student will be able to…
Develop their fine motor skills and create a turkey composition
in which they have the freedom to depict a turkey from a variety of materials
and art “scraps.”
|
||
|
Lesson
Plan
|
|||
|
1.
Set out bowls of artistic scraps or material (ideas in materials
section).
2.
Read “A Plump and Perky Turkey” by Teresa Bateman to children.
3.
Identify the basic storyline, characters, moral, humorous twist,
and artistic components in the illustration.
4.
Expand on the wildly creative kinds of turkeys that were
created.
5.
Have the kids glue down their own perky turkey cutout on a piece
of art paper.
6.
Have them select materials to compose their turkeys with from
various bowls of artistic objects around the classroom.
7.
Explain the importance of solid gluing and instruct them on the
overhead as to how to glue.
8.
Clean up all materials when turkeys have been glued. Allow some
of the students to share their work with the class.
|
Materials
Needed:
· Art construction
paper
· over head for
display
· pencils for each
child
· Bowls of
materials spread around the room with objects such as:
o Pasta
o Beans
o Cotton balls
o Sprinkles
o Crepe paper
o Pom poms
o Googly eyes
o Pipe cleaners
|
||
